
|
AISpace2 | Main Tools | News | Downloads | Prototype Tools | Customizable Applets | Practice Exercises | Help | About AIspace |
|
|
Tutorials
STRIPS to CSP converter
Tutorial 1: Creating A New ProblemThe applet starts up in 'Create' mode, and you can see this because the 'Create' tab is the currently selected tab. If at any point, you would like to restart the problem creation process from scratch after you've started to create a problem, simply select 'Create New STRIPS' from the 'File' menu. If you have just started the applet, or created a new problem, the screen should look like the one shown below:  The applet automatically begins in the 'Create Variable' submode, which you can see because it is the button that is depressed on the toolbar at the top of the window. If this button is depressed, then anytime you left click on the highlighted box of the canvas, a variable will be created, and similarly for each button that is depressed. Each time a button is clicked, the message canvas above the main canvas displays a message giving you information about what you can do next. If you click on the canvas now, the 'Variable Properties' dialog box will open: 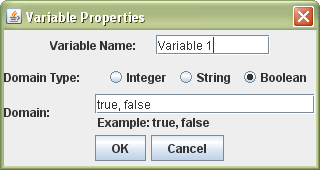 Each time you create a new variable, the Variable Properties dialog box will appear with a new variable name 'Ni', where i gets incremented with each new variable. You can also enter a new name if you like, by deleting 'Ni' and typing a new name into this box. A variable can be of type Integer, String, or Boolean. Select the appropriate radio button of the type that you want the current variable to be. For each type selected, an example of how to type in domain values in the 'Domain' field appears below the domain text area. The default domain values for type Boolean is 'true false'. There is no default values for the other types. After you have finished editing all the properties for this variable click 'OK'. The variable appears on the canvas, where your mouse was clicked, with the variable name and domain values visible. Also, you can always edit a variable again after it has been created by clicking on the 'Set Properties' button in 'Create' mode, and then clicking on a variable to bring up the 'Variable Properties' dialog box again. Create a few more variables if you like. Creating an ActionTo create an Action you need to first press the "Create Action" button from the button menu. When you do so the canvas should change to the following.  As with the variable to create an action you must click in the highlighted box labelled "Actions". When you do so the "Action creation/edit" box will appear. 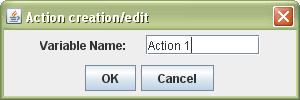 The "Action creation/edit" dialog initially shows only the action name as editable. Pressing "Ok" will result in the action being created on the canvas. Any time after the initial edit phase of the dialog you can see the properties of an action by clicking on "Set Properties" from the toolbar and then clicking on the action. The example below is what the action will look like after a preconstraint arc has been created. Note that the action's name may be edited at any time via this dialog. 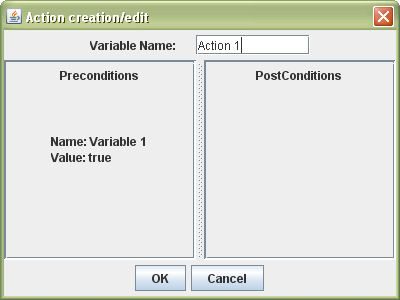 Creating a constraintTo create a constraint first press the "Create Arc" button from the toolbar. To create a constraint first click on either a variable in the "PreConditions" box and then an action; or an action and then a variable in the "PostConditions" box. The variable selected for the constraint determines the type of constraint created: a variable in the "PreConditions" box results in a "pre constraint" or "pre condition" being created and a variable in the "PostConditions" constraint results in a "post constraint", "post condition" or "effect" being created. after selecting the two nodes, the "Edge Editor" dialog will appear. It appears as below. 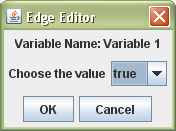 As can be seen from the above image the name of the participating variable in the constraint is shown in the dialog. The value area is a drop-down menu that, when clicked, will show all of the values in the domain of the variable. The value of the constraint is that of the selected value.
Presently constraints to an action are defined as a conjunction of all of the values of the arcs. That is, all of variables connected by arcs to a given action must have the value in the arc/constraint in order for the action to be able to take place in the world or, in the case of effect, all of the variables will be set to the value in the arc/constraints if the action is taken. Editing a stateIn the toolbar there are two buttons with names "Set Start State" and "Set Goal State". Pressing one of the state editor buttons will result in the "State Edtior" appearing. It looks like the following.
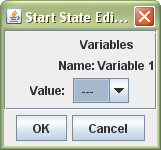 The state being edited is seen from the name of the dialog. All of the variables in the problem are also visible with their values. The variables are initialized to have no value; this means that the variables can take any value as the start or goal state. Much like in the edge editor dialog the value of the variable can be set by selecting a value from the drop-down menu next to the "value" label. After adding some variables, actions and arcs the problem can look like the one below.  To learn how to solve a problem, see Tutorial 2 on converting and solving STRIPS problems. |
| Main Tools: Graph Searching | Consistency for CSP | SLS for CSP | Deduction | Belief and Decision Networks | Decision Trees | Neural Networks | STRIPS to CSP |