|
AISpace2 | Main Tools | News | Downloads | Prototype Tools | Customizable Applets | Practice Exercises | Help | About AIspace |
|
|
Tutorials
Stochastic Local Search Based CSP Solver
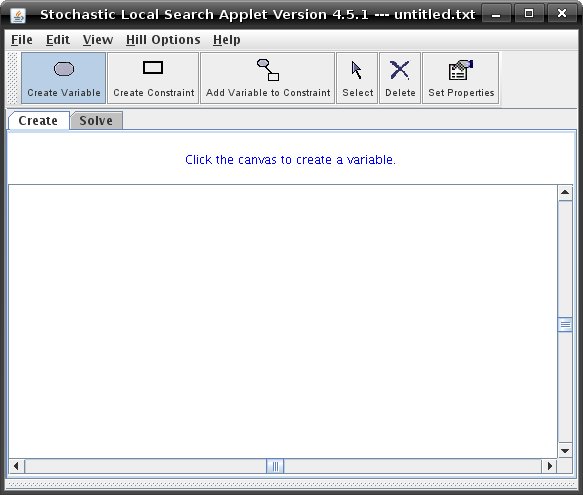
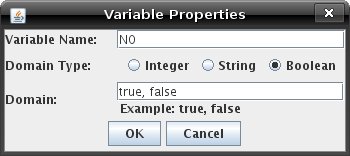
Tutorial 1: Creating A New CSPThe applet starts up in 'Create' mode, and you can see this because the 'Create' tab is the currently selected tab. If at any point, you would like to restart the CSP creation process from scratch after you've started to create a CSP, simply select 'Create New CSP' from the 'File' menu. If you have just started the applet, or created a new CSP, the screen should look like the one shown below:  The applet automatically begins in the 'Create Variable' submode, which you can see because it is the button that is depressed on the toolbar at the top of the window. If this button is depressed, then anytime you left click on the blank white canvas, a variable will be created, and similarly for each button that is depressed. Each time a button is clicked, the message panel above the canvas displays a message giving you information about what you can do next. If you click on the canvas now, the 'Variable Properties' dialog box will open:  Each time you create a new variable, the Variable Properties dialog box will appear with a new variable name 'Ni', where i gets incremented with each new variable. You can also enter a new name if you like, by deleting 'Ni' and typing a new name into this box. A variable can be of type Integer, String, or Boolean. Select the appropriate radio button of the type that you want the current variable to be. For each type selected, an example of how to type in domain values in the 'Domain' field appears below the domain text area. The default domain values for type Boolean is 'true, false'. There is no default values for the other types. After you have finished editing all the properties for this variable click 'OK'. The variable appears on the canvas, where your mouse was clicked, with the variable name and domain values visible. Also, you can always edit a variable again after it has been created by clicking on the 'Set Properties' button in 'Create' mode, and then clicking on a variable to bring up the 'Variable Properties' dialog box again. Create a few more variables if you like. There are many ways to create constraints between variables. With the 'Create Constraint' button depressed, you have three options (these options also appear on the message panel when 'Create Constraint' is clicked):
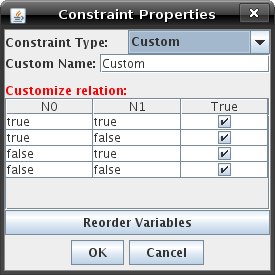
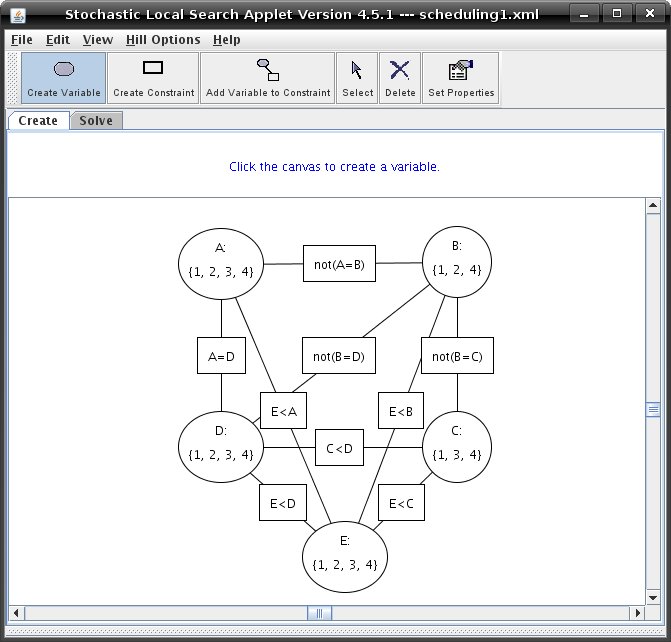
With the 'Add Variable to Constraint' button depressed, you can connect an existing variable to an existing constraint to add the variable to that constraint. Click on the variable or the constraint which you want to connect and the click on the respective constraint or variable. For each of these options, a 'Constraint Properties' dialog box, similar to the one below will appear on the screen:  The default type of a constraint is "Custom". With this type, a truth table for all the variables participating in the current constraint appears below 'Customize relation'. You can manually select the truth values for each combination of domain values for the variables in the truth table by clicking on the checkboxes directly on the table. You can also select a built in constraint from the available constraint types in the 'Constraint Type' combo box. Different constraint types appear depending on the domain types of the variables participating in the constraint. See the General Help page 'CSP Specification' to see the available built in constraint types. If you select a built in constraint type, you can take the complement of the type by checking the 'Take Complement' check box. You can reorder the variables participating in the constraint by clicking on the reorder variables button and following the directions. Note that only in some cases does reordering the variables in a constraint make a difference. Once you have finished editing the properties of the constraint, click 'OK' and the constraint will appear on the canvas as a square box, between its variables, with the constraint type visible. Also, every time you add a variable to the constraint, the 'Constraint Properties' dialog box will reappear so you can make the appropriate modifications to the existing constraint if necessary. And, just as for a variable, you can edit an existing constraint at any time by clicking on the 'Set Properties' button and then clicking on the constraint box to have the 'Constraint Properties' dialog box appear again. After creating a few more variables and constraints, your CSP might look something like this:  To learn how to solve a CSP using a Stochastic Local Search, see Tutorial 3 on solving CSPS. |
| Main Tools: Graph Searching | Consistency for CSP | SLS for CSP | Deduction | Belief and Decision Networks | Decision Trees | Neural Networks | STRIPS to CSP |