
|
AISpace2 | Main Tools | News | Downloads | Prototype Tools | Customizable Applets | Practice Exercises | Help | About AIspace |
|
|
Tutorials
Robot Control
Tutorial One: Creating and Loading MapsWhen you first open the applet, a small blue triangle will appear in the middle of a large white canvas, representing the robot. 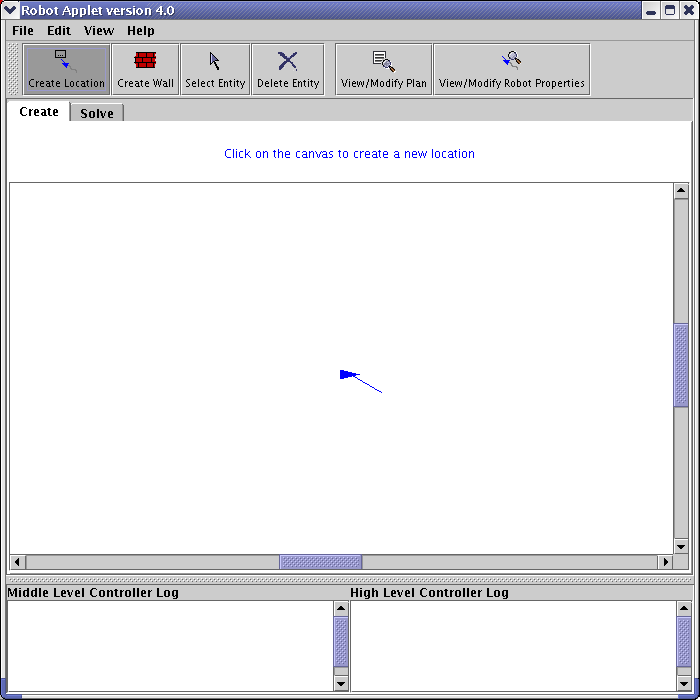 The design of the robot is quite simple - its only method of perception is a single whisker sensor on its left side that tells it whether or not it has hit a wall. There are only three types of entities in the robot's world: the robot itself, walls, and locations. Walls are simply obstructions that the robot must go around. If it hits a wall, then it is considered to have crashed. Locations are, as the name suggests, places that the robot can go. To create locations, click on the 'Create Location' button on the create toolbar above the main white canvas.  Then, if you click somewhere on the canvas, you will see a dialog with the coordinates of the location and a space for the location name. A default location name is provided, but may be replaced. Location names must begin with a lowercase letter and cannot have spaces in them. For those of you familiar with prolog naming conventions, location names must be prolog constants. The location dialog looks like this: 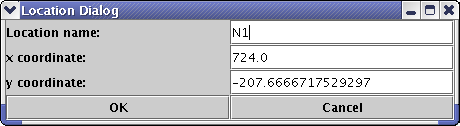 To create walls, select the 'Create Wall' button. Then, click anywhere on the canvas to place one side of the wall. Click on the canvas again to place the other side of it. Walls can run through locations, though they will be drawn as though they were behind them. Once you have created some locations and obstacles, the applet might look something like the picture below. 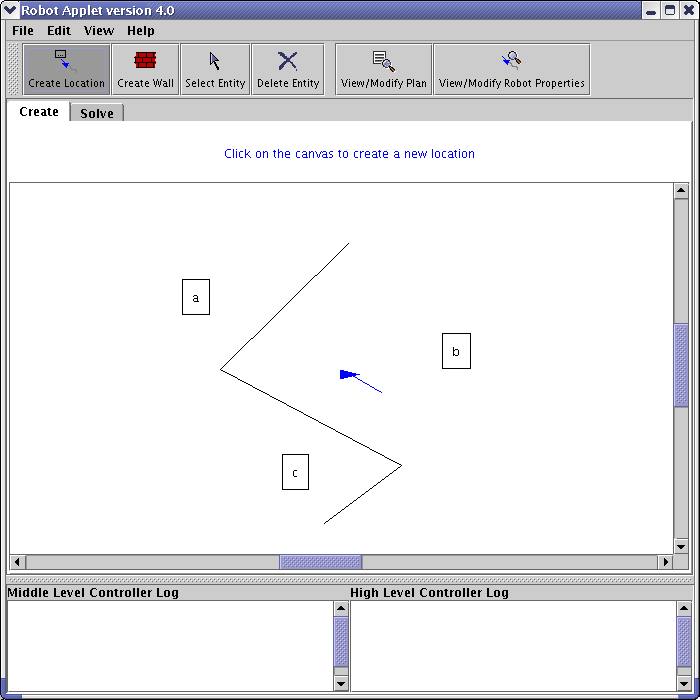 To move objects around, select them and drag them. You can move anything, including the robot, but the robot cannot be moved while it is running. If you want to work with a pre-written map, go to the 'File' menu and select 'Load Sample Graph'. You will see a dialog box that looks like this one: 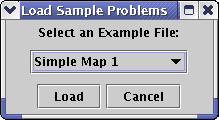 Simply select the map you would like to load, and click the 'Load' button. The sample maps also come with plans for the robot, which are discussed at the start of Tutorial 2. |
| Main Tools: Graph Searching | Consistency for CSP | SLS for CSP | Deduction | Belief and Decision Networks | Decision Trees | Neural Networks | STRIPS to CSP |